Deploy Self-Hosted LLMs on Kubernetes Clusters
Deploy LLMs on on-premise Kubernetes with k3s or kubeadm, leveraging NVIDIA GPU Operator, auto-scaling, and optimized storage to achieve full control, data sovereignty, and cloud-competitive costs while efficiently running models from 7B to 70B parameters.

TLDR;
- k3s deploys in seconds with 50MB binary versus 200MB+ for full Kubernetes
- Cloud GPUs cost $2-5/hour, owning an A100 pays for itself in 3-7 months of 24/7 operation
- NVIDIA GPU Operator automates driver installation and device plugin configuration
- HPA with 300s scale-down stabilization prevents thrashing during traffic fluctuations
Deploy LLMs on self-hosted Kubernetes clusters and maintain complete control over your infrastructure and data. This guide covers cluster setup, GPU configuration, model deployment, and production scaling for on-premise LLM inference.
Self-hosted Kubernetes gives you complete control over LLM infrastructure while maintaining cloud-native deployment patterns. Data sovereignty drives many on-premise deployments, as regulatory requirements in healthcare, finance, and government often prevent cloud deployment. Running Kubernetes on-premise keeps all model weights, inference requests, and generated outputs within your data center. Cost economics favor on-premise at scale. Cloud GPU costs run $2-5 per hour, while owning a $10,000 A100 GPU means it pays for itself in 2000-5000 hours representing 3-7 months of 24/7 operation. Scale to dozens of GPUs and savings multiply dramatically. Infrastructure control matters for customization, allowing you to configure network topology exactly as needed, tune kernel parameters for GPU performance, and integrate with existing bare-metal management tools. Cloud providers lock you into their abstractions and limit deep system configuration. Use on-premise Kubernetes when you need data residency compliance, have existing data center infrastructure, operate at cloud-competitive scale, or require deep infrastructure customization.
Kubernetes Distribution Selection and Installation
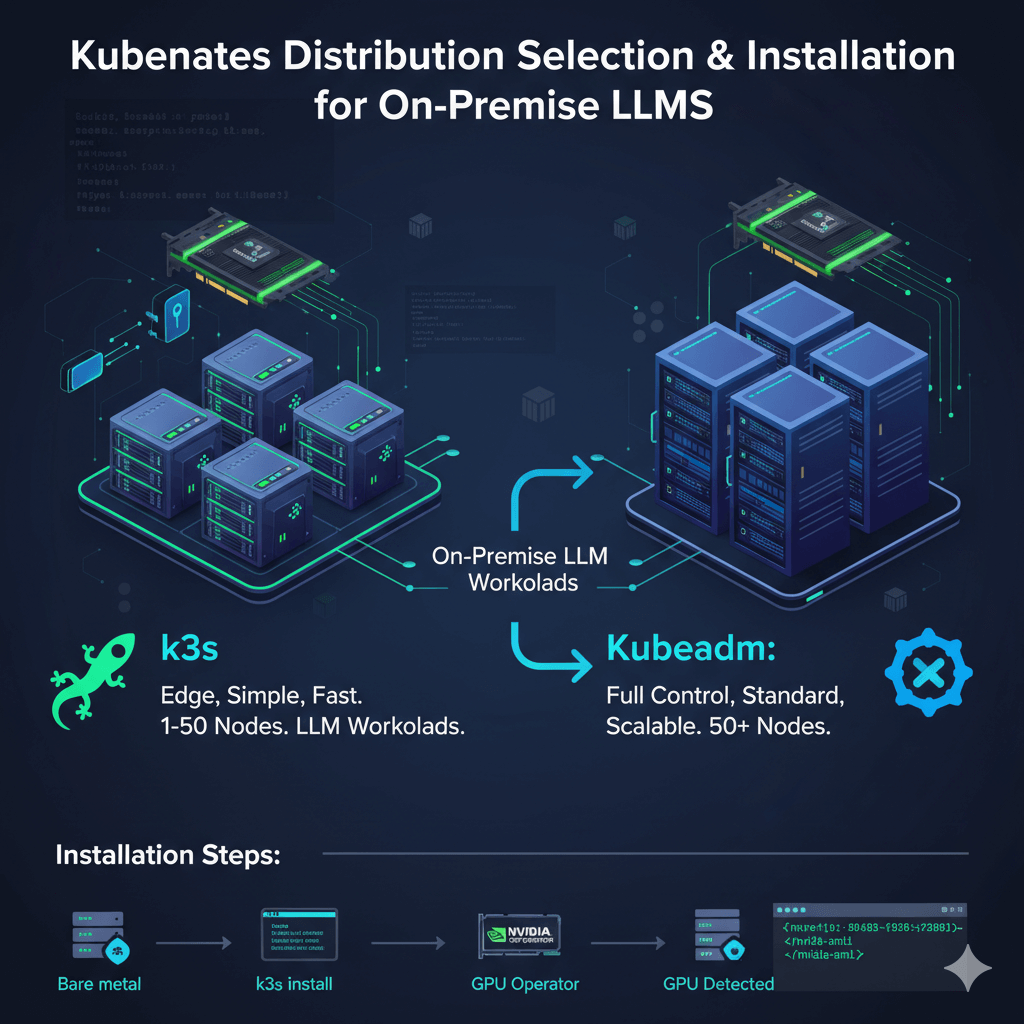
Select the right Kubernetes distribution for on-premise LLM workloads. k3s is perfect for on-premise GPU clusters, removing cloud-specific components and reducing memory footprint. It starts in seconds with a 50MB binary versus 200MB+ for full Kubernetes, offers fast installation with a single binary and no complex dependencies, works excellently with NVIDIA GPU Operator, and is production-ready as used by SUSE Rancher customers. Use k3s for small to medium deployments (1-50 nodes), edge locations, and teams wanting simplicity.
kubeadm provides vanilla Kubernetes for teams wanting full control. It is the official Kubernetes tool with complete feature set, community support, and upgradeability to any Kubernetes version. Use kubeadm for large deployments (50+ nodes), teams with Kubernetes expertise, and organizations requiring standard Kubernetes.
Install k3s on bare metal servers with NVIDIA GPUs. Install the k3s master node by running the installation script with server mode, disabling traefik and servicelb if using custom ingress or load balancers, and setting write permissions for kubeconfig. Get the node token for workers and verify installation. On GPU worker nodes, get the master IP and token first, then install the k3s agent and verify the GPU node joined the cluster.
Install NVIDIA GPU Operator to automate GPU driver installation, device plugin deployment, and runtime configuration. Add the NVIDIA Helm repository and update, create the GPU operator namespace, install the GPU operator with driver, toolkit, and device plugin enabled, then wait for pods to be ready which takes 5-10 minutes.
Verify GPU detection by checking GPU resources in node capacity and running a test pod that executes nvidia-smi. You should see GPU information confirming successful detection and configuration.
Model Deployment and Auto-Scaling
Deploy vLLM, TensorRT-LLM, or other inference servers on Kubernetes. For single-GPU deployment, create a Deployment with 2 replicas where each uses 1 GPU. Configure the container with the vLLM image, model path, tensor parallelism, GPU memory utilization, and network binding. Set resource requests and limits for GPU, memory, and CPU. Use volume mounts for model cache persistence via hostPath. Apply node selectors and tolerations to ensure scheduling on GPU nodes.
For multi-GPU models with tensor parallelism, use a StatefulSet instead of Deployment. Configure the model to use 4 GPUs with tensor parallelism, request 4 GPUs in resources, and use appropriate node selectors to schedule on nodes with sufficient GPU capacity. Mount model cache from host path for faster loading.
Create Service and Ingress configurations to expose your deployments. Define a ClusterIP service selecting your deployment pods and exposing the HTTP port. Create an Ingress resource with appropriate annotations for proxy settings including unlimited body size and extended read timeout for long-running inference requests. Configure host-based routing to your service.
Scale LLM inference based on load with Horizontal Pod Autoscaler. Configure HPA to scale between minimum and maximum replicas based on CPU utilization and custom metrics such as HTTP requests per second. Set behavior policies for scale-up and scale-down with stabilization windows and rate limits. Scale-up should be responsive with 60 second stabilization, while scale-down should be conservative with 300 second stabilization to avoid thrashing.
For dynamic node scaling, install cluster autoscaler and configure with your bare-metal provisioning system such as Metal³, MAAS, or custom solutions. This enables automatic node provisioning as pod demand increases.
Monitoring and Storage Management
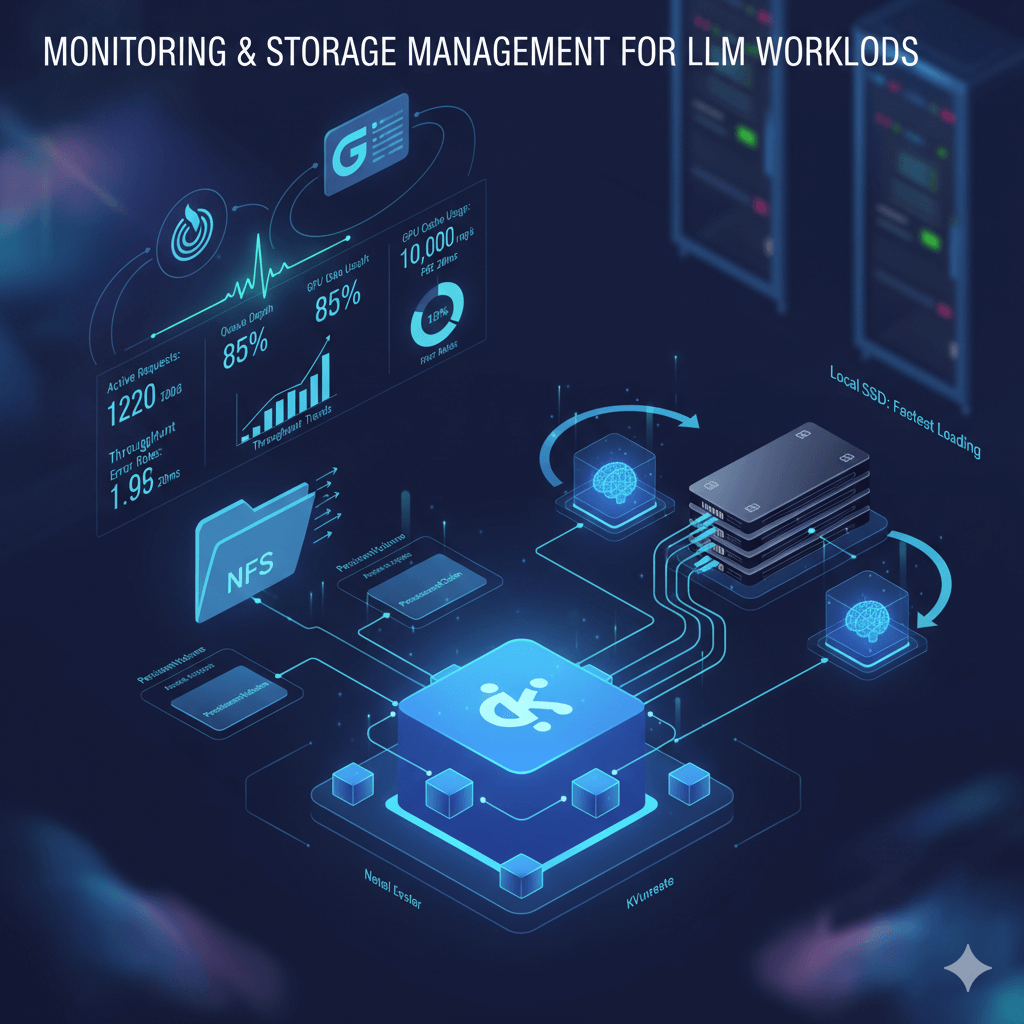
Monitor LLM workloads on Kubernetes by installing the Prometheus stack using Helm. Install kube-prometheus-stack in the monitoring namespace with service monitor selection disabled to discover all monitors. Create ServiceMonitor resources for vLLM metrics that scrape the /metrics endpoint every 15 seconds. Track key metrics including active requests, queue depth, GPU cache usage percentage, throughput, and latency.
Access Grafana through port-forwarding and import vLLM dashboards or create custom dashboards. Monitor throughput trends, latency percentiles (P50, P95, P99), queue depth, GPU utilization, and error rates to identify performance issues.
Manage model storage efficiently using shared NFS storage for read-only access across multiple pods. Create PersistentVolume and PersistentVolumeClaim resources pointing to your NFS server with model files. Mount this PVC in your deployments to share model weights across pods, reducing storage duplication.
For best performance, use local SSD with hostPath volumes. Mount NVMe SSD directories directly in pod specifications for fastest model loading times. Pre-download models to each node to avoid network transfer delays during pod startup.
Production Best Practices and Deployment Patterns
Deploy LLMs reliably in production by always setting resource requests and limits. Define GPU, memory, and CPU requests matching your typical usage, with limits preventing resource exhaustion. This prevents scheduling issues and resource contention between pods.
Prevent too many pods being disrupted during maintenance with Pod Disruption Budgets. Set minimum available replicas to maintain service availability during node maintenance or rolling updates.
Configure proper health checks with liveness and readiness probes. Use HTTP GET probes checking the /health endpoint with appropriate timeouts. LLM models take time to load, so allow sufficient initial delay seconds (600 seconds for liveness, 30 seconds for readiness) to prevent premature pod restarts.
For production on-premise Kubernetes LLM deployment, plan for minimum 3 nodes including 1 control plane node (4 CPU, 8GB RAM, no GPU) and 2 GPU worker nodes (16+ CPU, 64GB+ RAM, 1-4 GPUs each depending on model size). For Llama 2 7B, 2x nodes with RTX 4090 (24GB each) handle moderate traffic. For 70B models, you need 2-4 nodes with A100 80GB GPUs. Storage requires 1-2TB NVMe SSD for model weights and cache. Network needs 10GbE minimum between nodes, 25GbE recommended for multi-GPU workloads using tensor parallelism.
Handle model updates and A/B testing using Kubernetes deployment strategies. For blue-green deployments, create a new deployment with the updated model, test with traffic subset using service mesh like Istio or Linkerd to split traffic (90% old, 10% new), validate quality and performance metrics, then shift 100% traffic to new deployment. For canary releases, use weighted routing in your ingress controller or service mesh. Use ArgoCD or Flux for GitOps-based model versioning where model configs live in Git and automated pipelines deploy them.
Mix different model sizes and types on the same Kubernetes cluster for resource efficiency. Use namespaces to organize different models (llm-small-models, llm-large-models). Apply node labels (gpu-memory=24gb, gpu-memory=80gb) and use nodeSelectors or node affinity to schedule models on appropriate hardware, placing 7B models on RTX 4090 nodes and 70B models on A100 nodes. Use resource quotas per namespace to prevent one model consuming all cluster resources.
Conclusion
On-premise Kubernetes provides complete control over LLM infrastructure while maintaining cloud-native deployment patterns for flexibility and portability. Deploy k3s for lightweight GPU clusters or kubeadm for standard Kubernetes on larger deployments. Use NVIDIA GPU Operator to automate GPU configuration and device plugin management. Scale workloads automatically with Horizontal Pod Autoscaler based on CPU and custom metrics, implementing conservative scale-down policies to avoid thrashing. Store models on shared NFS for multi-pod access or local NVMe for maximum performance. Implement proper health checks with extended initial delays to account for model loading time. Mix different models on the same cluster using namespaces, node labels, and resource quotas for efficient hardware utilization. For teams requiring data sovereignty, infrastructure control, and cloud-competitive economics at scale, on-premise Kubernetes delivers production-ready LLM deployment with complete operational flexibility.