Customizing Backstage Kubernetes Plugin for Efficiency
Learn to customize Backstage Kubernetes plugin for your unique workflow needs. Master resource management with tailored plugin configurations.

TL;DR
- Backstage Kubernetes plugin connects clusters to your developer portal – view pods, services, deployments in one UI. Customization makes it fit your team's workflow, not the default.
- Four customization areas: UI (branding, usability), external tools (monitoring, logging, security), RBAC (restrict resources by role), automated workflows (deploy, scale, config updates).
- Installation requires both frontend and backend plugins –
@backstage/plugin-kubernetes(frontend),@backstage/plugin-kubernetes-backend(backend).KubernetesBuilderconnects them. - Configuration in
app-config.yaml– define clusters (URL, authProvider, serviceAccountToken). Annotate catalog entities withkubernetesfield andclusterSelector. - RBAC permissions needed – backend requires read-only access to pods, services, configmaps, deployments, replicasets, HPAs, ingresses.
- Best practices: version compatibility, staging testing, documentation, community engagement.
The Backstage Kubernetes plugin's customization capabilities empower you to create a truly tailored experience for managing your Kubernetes resources within Backstage. By following the steps outlined above and leveraging the available resources, you can extend the plugin's functionality to perfectly suit your specific workflow.
Backstage, the open-source platform from Spotify, has become a popular choice for building a unified developer portal. One of its key features is the Kubernetes plugin, providing a centralized view of your Kubernetes resources. But what if the default functionality doesn't quite fit your specific needs? The good news is, the Backstage Kubernetes plugin offers a high degree of customization.
| Benefit | Value |
|---|---|
| Unified portal | Centralized Kubernetes resource management |
| Direct interaction | Manage resources without switching tools |
| Enhanced efficiency | Streamlined deployment and monitoring |
| Developer empowerment | Robust toolset for Kubernetes management |
Understanding the Plugin
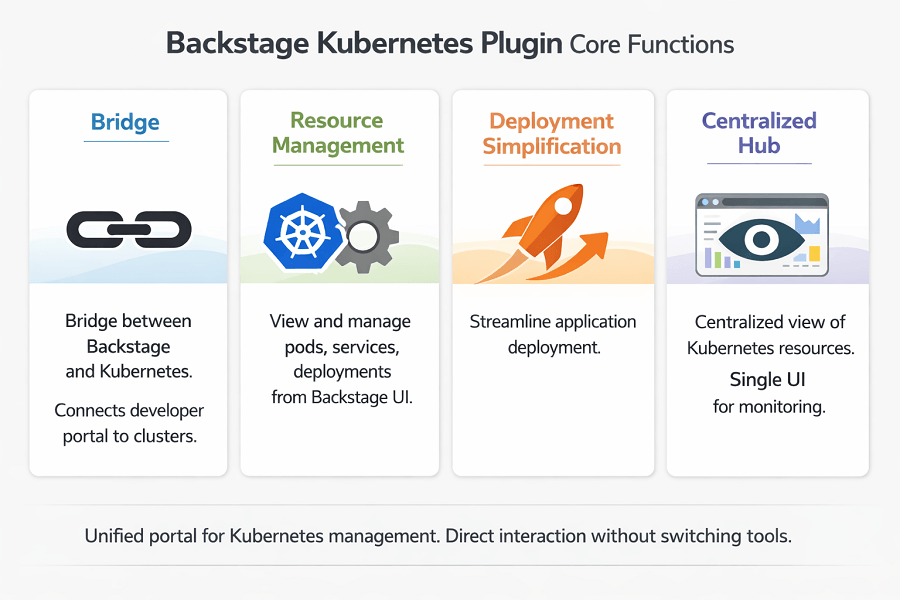
Backstage Kubernetes Plugin - Core Functions:
| Function | Description |
|---|---|
| Bridge between Backstage and Kubernetes | Connects developer portal to Kubernetes clusters |
| Resource management | View and manage pods, services, deployments from Backstage UI |
| Deployment simplification | Streamline application deployment |
| Monitoring | Centralized view of Kubernetes resources |
| Centralized hub | Single UI for accessing and controlling Kubernetes resources |
Customization Options
Customizing the Backstage Kubernetes Plugin allows organizations to tailor the integration to their specific needs and workflows. Here are some key aspects to consider when customizing the plugin:
- UI Customization: Modify the visual representation of Kubernetes resources within Backstage to align with your organization's branding or to enhance usability for developers.
- Integration with External Tools: Extend the plugin to integrate with external monitoring, logging, or security tools to provide a comprehensive view of your Kubernetes ecosystem directly within Backstage.
- Role-Based Access Control: Implement role-based access control (RBAC) to restrict access to certain Kubernetes resources based on user roles and permissions, ensuring security and compliance.
- Automated Workflows: Configure automated workflows within the plugin to streamline common tasks such as deploying applications, scaling resources, or updating configurations, improving efficiency and reducing manual errors.
Best Practices
When customizing the Backstage Kubernetes Plugin, it is essential to follow best practices to ensure a seamless integration and optimal performance:
- Version Compatibility: Ensure that the plugin is compatible with the version of Backstage and Kubernetes you are using to avoid compatibility issues and potential errors.
- Testing and Validation: Thoroughly test any customizations made to the plugin in a staging environment before deploying them to production to identify and address any issues proactively.
- Documentation: Document all customizations, configurations, and workflows implemented in the plugin to facilitate knowledge sharing and troubleshooting for developers within your organization.
- Community Engagement: Leverage the vibrant Backstage community to seek guidance, share insights, and contribute back to the ecosystem by sharing your customizations and best practices with the community.
Installation
To install the Backstage Kubernetes plugin, follow these steps:
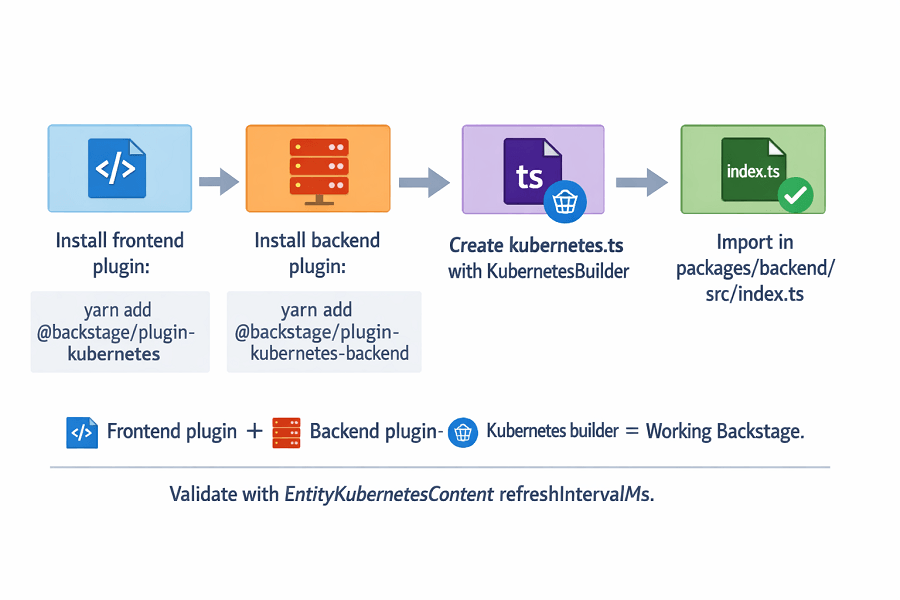
- Add the frontend plugin to your Backstage application:
# From your Backstage root directory
yarn --cwd packages/app add @backstage/plugin-kubernetes
This installs the @backstage/plugin-kubernetes package in your packages/app directory.
- Import the plugin in your app by adding the "Kubernetes" tab to the respective catalog pages:
   import { EntityKubernetesContent } from "@backstage/plugin-kubernetes";

   const serviceEntityPage = (
     <EntityLayout>
       {/* other tabs... */}
       <EntityLayout.Route path="/kubernetes" title="Kubernetes">
         <EntityKubernetesContent refreshIntervalMs={30000} />
       </EntityLayout.Route>
     </EntityLayout>
   );
The refreshIntervalMs property on EntityKubernetesContent defines the interval in which the content automatically refreshes, defaulting to 10 seconds if not set.
- Add the backend plugin to your Backstage application:
# From your Backstage root directory
yarn --cwd packages/backend add @backstage/plugin-kubernetes-backend
This installs the @backstage/plugin-kubernetes-backend package in your packages/backend directory.
- Create a
kubernetes.tsfile inpackages/backend/src/plugins/with the following content:
   import { KubernetesBuilder } from "@backstage/plugin-kubernetes-backend";
   import { Router } from "express";
   import { PluginEnvironment } from "../types";
   import { CatalogClient } from "@backstage/catalog-client";

   export default async function createPlugin(
     env: PluginEnvironment,
   ): Promise<Router> {
     const catalogApi = new CatalogClient({ discoveryApi: env.discovery });
     const { router } = await KubernetesBuilder.createBuilder({
       logger: env.logger,
       config: env.config,
       catalogApi,
       discovery: env.discovery,
       permissions: env.permissions,
     }).build();
     return router;
   }
This sets up the backend plugin.
- Import the plugin in
packages/backend/src/index.ts
   import kubernetes from "./plugins/kubernetes";

   async function main() {
     // ...
     const kubernetesEnv = useHotMemoize(module, () => createEnv("kubernetes"));
     // ...
     apiRouter.use("/kubernetes", await kubernetes(kubernetesEnv));
   }
This adds the Kubernetes plugin to the backend1. After following these steps, the Backstage Kubernetes plugin will be installed and ready for configuration in your Backstage application.
Frontend plugin + backend plugin + Kubernetes builder = working Backstage. We handle the installation.
The installation steps involve multiple packages, configuration files, and validation. One missed step breaks the integration.
We help you:
- Install the frontend plugin –
@backstage/plugin-kuberneteswith EntityKubernetesContent - Install the backend plugin –
@backstage/plugin-kubernetes-backendwith KubernetesBuilder - Configure
kubernetes.ts– Set up catalogApi, permissions, discovery, and logger - Validate installation – Ensure the plugin appears in Backstage and connects to clusters
Configuration
To configure the Backstage Kubernetes plugin after installation, follow these steps:
- Allow the backend to collect objects from your Kubernetes cluster(s):
# app-config.yaml
   kubernetes:
   serviceLocatorMethod: "multiTenant"
   clusterLocatorMethods:
       - "config"
   clusters:
       - url: http://127.0.0.1:9999
       name: minikube
       authProvider: "serviceAccount"
       serviceAccountToken:
           $env: K8S_MINIKUBE_TOKEN
       - url: http://127.0.0.2:9999
       name: gke-cluster-1
       authProvider: "google"
This configuration entry specifies the Kubernetes clusters that the backend should connect to.
- Grant the required RBAC permissions to the backend:
apiVersion: rbac.authorization.k8s.io/v1
   kind: Role
   metadata:
   namespace: default
   name: pod-reader
   rules:
   - apiGroups: [""]
       resources: ["pods"]
       verbs: ["get", "watch", "list"]
The backend requires read-only access to pods, services, configmaps, deployments, replicasets, horizontalpodautoscalers, and ingresses.
- Surface your Kubernetes objects in catalog entities:
apiVersion: backstage.io/v1alpha1
   kind: Component
   metadata:
   name: example-component
   spec:
   type: service
   lifecycle: production
   owner: user:guest
   system: example-system
   kubernetes:
     authProvider: "google"
     clusterSelector:
     matchLabels:
       team: devops
Annotate your catalog entities with the kubernetes field to specify the cluster and authentication details.
After configuring the backend and catalog, the Backstage Kubernetes plugin will be able to display the Kubernetes resources associated with each component in the Backstage interface.
Conclusion
Customizing the Backstage Kubernetes Plugin offers a unique opportunity to enhance the integration between Backstage and Kubernetes, empowering developers with a robust set of tools to manage Kubernetes resources efficiently.
By following best practices and leveraging the flexibility of the plugin, organizations can create a tailored experience that aligns with their specific requirements and accelerates the software development lifecycle.
Frequently Asked Questions (FAQs)
What is the Backstage Kubernetes plugin and why should I customize it?
The Backstage Kubernetes plugin connects your Backstage developer portal to your Kubernetes clusters, making it easy to view and manage resources like pods, services, and deployments within a single UI. Customizing the plugin lets you tailor its features to your team’s workflows and priorities, improving visibility and developer efficiency.
What types of customizations can I apply to the Kubernetes plugin?
You can customize the plugin in several ways, such as:
| Customization Type | Description |
|---|---|
| UI updates | Match branding, improve usability |
| External integrations | Integrate monitoring or logging tools |
| RBAC enforcement | Role-based access control for Kubernetes resources |
| Automation | Automate common tasks (deployments, scaling) |
How does customizing the plugin improve developer productivity?
By tailoring the plugin to your team’s needs, for example, automating routine workflows or integrating key observability tools, developers spend less time context-switching and more time building and delivering features. Customized views also help teams quickly identify issues and act on them faster.
What are best practices for customizing the Backstage Kubernetes plugin?
Best practices include ensuring version compatibility with both Backstage and your Kubernetes clusters, thoroughly testing changes in staging environments before production, documenting all customizations and workflows, and engaging with the Backstage community for support and shared insights.
Do I need special permissions or configuration to use the customized Kubernetes plugin?
Yes. Prerequisites for Customization:
| Requirement | Description |
|---|---|
| Backstage backend configuration | Configure to enable plugin access |
| Kubernetes RBAC permissions | Grant appropriate permissions for secure cluster access |
| Security alignment | Ensure access controls suit organization's policies |