Container-First Development
Learn multi-stage builds, local development workflows with Docker Compose, and production deployment strategies for faster, more reliable applications.
TL;DR
- Containers from day one: Stop developing directly on your laptop. Define your entire environment—application, database, cache—in Docker from the start. New team members run
docker compose upand code immediately. - Multi-stage builds are essential: Use a single Dockerfile with base, development, and production targets. Development includes debug tools and hot reload; production is minimal, non-root, and 60-70% smaller.
- Docker Compose for local dev: Define your full stack (app + PostgreSQL + Redis) in
docker-compose.yml. Use bind mounts for live code reload and named volumes for persistent data. This eliminates "works on my machine" forever. - Production-ready patterns: Push versioned images (use semantic tags, never mutable
latest) to registries. Deploy to Kubernetes with liveness/readiness probes, resource limits, and health checks. Always scan images for vulnerabilities before deployment. - Security is non-negotiable: Run containers as non-root users, use minimal base images (Alpine, distroless), and never bake secrets into images. Add vulnerability scanning (Trivy) to CI/CD pipelines.
Your team builds applications on local machines, then spends days fixing deployment issues in production. Environment inconsistencies cause bugs that only appear in staging. Developers waste time setting up dependencies instead of writing code.
Container-first development solves these problems by making containers the default development environment. According to the 2024 CNCF survey, 89% of organizations have adopted cloud-native technologies, with 93% using or evaluating Kubernetes. Teams that adopt container-first development deploy 3-5x faster and reduce environment-related bugs by 80%.
This guide shows you how to build applications container-first from day one. You'll learn practical patterns for local development, multi-stage builds, and production deployment strategies.
Prerequisites: Basic understanding of Docker and containers. Familiarity with your application's programming language. Docker Desktop or similar container runtime installed.
What you'll learn: Container-first development principles, local development workflows, multi-stage builds for optimization, and production-ready deployment patterns.
Why Container-First Development
Traditional development starts with code on local machines. Developers install language runtimes, databases, and dependencies directly on their workstations. This creates several problems.
Environment drift happens when development machines differ from production. A bug might appear only in production because of Python version differences, missing environment variables, or different database configurations.
Onboarding friction slows new team members. Setting up a development environment takes hours or days. New developers follow outdated README instructions, hit cryptic errors, and need help from senior engineers.
Works on my machine becomes a common excuse. Code runs fine locally but fails in CI/CD or production because of subtle environment differences.
Container-first development flips this model. You build containers from the start. Your development environment IS a container. This provides:
- Consistency: Identical environments from laptop to production
- Fast onboarding: New developers run
docker compose upand start coding - Reproducibility: Same code + same container = same behavior every time
- Production parity: Development environment matches production
The 2024 State of DevOps Report shows teams using container-first development deploy 55% faster with 47% better reliability.
Container-First Dockerfile Structure
Start with a production-ready Dockerfile that supports both development and production.
# Multi-stage build for Node.js application
FROM node:20-alpine AS base

# Install dependencies
WORKDIR /app
COPY package*.json ./
RUN npm ci --only=production

# Development stage with dev dependencies
FROM base AS development
RUN npm ci
COPY . .
EXPOSE 3000
CMD ["npm", "run", "dev"]

# Build stage for production
FROM base AS build
COPY --from=development /app/node_modules ./node_modules
COPY . .
RUN npm run build

# Production stage - minimal image
FROM node:20-alpine AS production
WORKDIR /app

# Copy only production dependencies and built assets
COPY --from=base /app/node_modules ./node_modules
COPY --from=build /app/dist ./dist
COPY package*.json ./

# Run as non-root user
RUN addgroup -g 1001 -S nodejs && \
    adduser -S nodejs -u 1001
USER nodejs

EXPOSE 3000
CMD ["node", "dist/index.js"]
This Dockerfile provides three targets:
- base: Common layer with production dependencies
- development: Full environment with dev tools
- production: Minimal image with only runtime requirements
Build for development:
docker build --target development -t myapp:dev .
docker run -p 3000:3000 -v $(pwd):/app myapp:dev
The volume mount enables live code reloading. Changes you make appear immediately in the running container.
Build for production:
docker build --target production -t myapp:prod .
docker run -p 3000:3000 myapp:prod
Production builds exclude development dependencies and source maps, reducing image size by 60-70%.
Local Development with Docker Compose
Docker Compose defines your complete development environment - application, databases, caches, and message queues.
# docker-compose.yml
version: '3.9'

services:
  app:
    build:
      context: .
      target: development
    ports:
      - "3000:3000"
    volumes:
      # Mount source code for live reloading
      - ./src:/app/src
      - ./package.json:/app/package.json
      # Named volume for node_modules to avoid host conflicts
      - node_modules:/app/node_modules
    environment:
      NODE_ENV: development
      DATABASE_URL: postgresql://postgres:postgres@db:5432/myapp
      REDIS_URL: redis://redis:6379
    depends_on:
      db:
        condition: service_healthy
      redis:
        condition: service_started
    command: npm run dev

  db:
    image: postgres:16-alpine
    environment:
      POSTGRES_USER: postgres
      POSTGRES_PASSWORD: postgres
      POSTGRES_DB: myapp
    ports:
      - "5432:5432"
    volumes:
      - postgres_data:/var/lib/postgresql/data
      - ./scripts/init-db.sql:/docker-entrypoint-initdb.d/init.sql
    healthcheck:
      test: ["CMD-SHELL", "pg_isready -U postgres"]
      interval: 5s
      timeout: 5s
      retries: 5

  redis:
    image: redis:7-alpine
    ports:
      - "6379:6379"
    volumes:
      - redis_data:/data

  # Optional: Run tests in separate service
  test:
    build:
      context: .
      target: development
    volumes:
      - ./src:/app/src
      - ./test:/app/test
      - node_modules:/app/node_modules
    environment:
      NODE_ENV: test
      DATABASE_URL: postgresql://postgres:postgres@db:5432/myapp_test
    depends_on:
      - db
    command: npm run test:watch
    profiles: ["test"]

volumes:
  postgres_data:
  redis_data:
  node_modules:
Start your entire stack:
docker compose up
Everything runs - application, database, Redis cache. New team members run this command and have a working environment in minutes.
Run tests:
docker compose --profile test up test
Tests run in an isolated container with a separate test database.
Database migrations:
docker compose exec app npm run migrate
Run commands inside running containers.
Development Workflow Patterns
Pattern 1: Hot Reload
Your container watches for file changes and reloads automatically.
For Node.js with nodemon:
{
  "scripts": {
    "dev": "nodemon --watch src --exec node src/index.js"
  }
}
For Python with Flask:
# app.py
from flask import Flask
import os

app = Flask(__name__)

if __name__ == '__main__':
    # Enable debug mode in development
    app.run(
        host='0.0.0.0',
        port=5000,
        debug=os.getenv('FLASK_ENV') == 'development'
    )
Pattern 2: Interactive Debugging
Debug applications running in containers.
Add debugging support to your Dockerfile:
FROM node:20-alpine AS development
WORKDIR /app
COPY package*.json ./
RUN npm ci
COPY . .

# Expose debug port
EXPOSE 3000 9229

# Start with debugging enabled
CMD ["node", "--inspect=0.0.0.0:9229", "src/index.js"]
In docker-compose.yml:
services:
  app:
    build:
      target: development
    ports:
      - "3000:3000"
      - "9229:9229"  # Debug port
Connect your IDE debugger to localhost:9229.
Pattern 3: Database Seeding
Populate development databases with test data.
-- scripts/seed.sql
INSERT INTO users (email, name, created_at) VALUES
  ('alice@example.com', 'Alice Smith', NOW()),
  ('bob@example.com', 'Bob Jones', NOW());

INSERT INTO products (name, price, stock) VALUES
  ('Widget A', 29.99, 100),
  ('Widget B', 39.99, 50);
Run seed script on startup:
services:
  db:
    image: postgres:16-alpine
    volumes:
      - ./scripts/init-db.sql:/docker-entrypoint-initdb.d/01-schema.sql
      - ./scripts/seed.sql:/docker-entrypoint-initdb.d/02-seed.sql
PostgreSQL automatically executes scripts in /docker-entrypoint-initdb.d/ on first startup.
Production Deployment Strategies
Container Registry Management
Push images to container registries for deployment.
# Build for production
docker build --target production -t myapp:1.2.3 .

# Tag for registry
docker tag myapp:1.2.3 registry.example.com/myapp:1.2.3
docker tag myapp:1.2.3 registry.example.com/myapp:latest

# Push to registry
docker push registry.example.com/myapp:1.2.3
docker push registry.example.com/myapp:latest
Tagging strategy:
- Semantic versions:
1.2.3,1.2,1 - Git commit SHA:
git-a1b2c3d - Environment tags:
staging,production - Never use mutable tags like
latestin production
Kubernetes Deployment
Deploy containers to Kubernetes:
# k8s/deployment.yaml
apiVersion: apps/v1
kind: Deployment
metadata:
  name: myapp
  labels:
    app: myapp
spec:
  replicas: 3
  selector:
    matchLabels:
      app: myapp
  template:
    metadata:
      labels:
        app: myapp
        version: "1.2.3"
    spec:
      containers:
      - name: myapp
        image: registry.example.com/myapp:1.2.3
        ports:
        - containerPort: 3000
          protocol: TCP
        env:
        - name: NODE_ENV
          value: production
        - name: DATABASE_URL
          valueFrom:
            secretKeyRef:
              name: myapp-secrets
              key: database-url
        resources:
          requests:
            memory: "256Mi"
            cpu: "250m"
          limits:
            memory: "512Mi"
            cpu: "500m"
        livenessProbe:
          httpGet:
            path: /health
            port: 3000
          initialDelaySeconds: 30
          periodSeconds: 10
        readinessProbe:
          httpGet:
            path: /ready
            port: 3000
          initialDelaySeconds: 5
          periodSeconds: 5
---
apiVersion: v1
kind: Service
metadata:
  name: myapp
spec:
  selector:
    app: myapp
  ports:
  - port: 80
    targetPort: 3000
  type: ClusterIP
Deploy with kubectl:
kubectl apply -f k8s/deployment.yaml
Security Best Practices
Run as Non-Root User
Never run containers as root in production.
FROM node:20-alpine AS production
WORKDIR /app

# Create non-root user
RUN addgroup -g 1001 -S nodejs && \
    adduser -S nodejs -u 1001

# Change ownership before switching users
COPY --chown=nodejs:nodejs . .

# Switch to non-root user
USER nodejs

CMD ["node", "dist/index.js"]
Scan for Vulnerabilities
Scan images before deployment:
# Using Trivy
docker run --rm -v /var/run/docker.sock:/var/run/docker.sock \
  aquasec/trivy image myapp:1.2.3

# In CI/CD pipeline
trivy image --severity HIGH,CRITICAL --exit-code 1 myapp:1.2.3
Fail builds if critical vulnerabilities are found.
Use Minimal Base Images
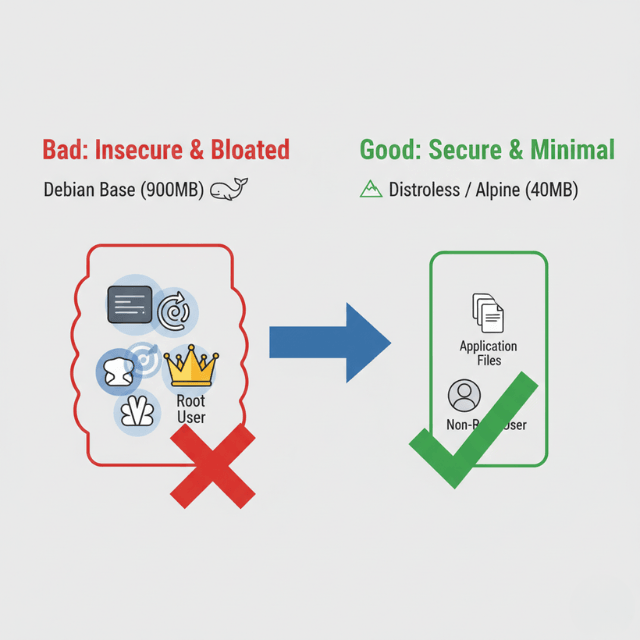
Reduce attack surface with minimal base images:
- Alpine Linux:
node:20-alpine(40MB vs 900MB for full Debian) - Distroless:
gcr.io/distroless/nodejs20-debian12(no shell, no package manager) - Scratch: Build fully static binaries for smallest possible images
Monitoring and Observability
Add health check endpoints:
// src/health.js
const express = require('express');
const db = require('./database');
const redis = require('./redis');

function setupHealthChecks(app) {
  // Liveness probe - is container alive?
  app.get('/health', (req, res) => {
    res.status(200).json({ status: 'ok' });
  });

  // Readiness probe - can container handle traffic?
  app.get('/ready', async (req, res) => {
    try {
      // Check database connection
      await db.query('SELECT 1');

      // Check Redis connection
      await redis.ping();

      res.status(200).json({
        status: 'ready',
        checks: {
          database: 'ok',
          redis: 'ok'
        }
      });
    } catch (error) {
      res.status(503).json({
        status: 'not ready',
        error: error.message
      });
    }
  });
}

module.exports = { setupHealthChecks };
Common Pitfalls and Solutions
Pitfall 1: Large image sizes
Solution: Use multi-stage builds, minimal base images, and .dockerignore files.
Pitfall 2: Slow builds
Solution: Order Dockerfile commands from least to most frequently changing. Leverage build cache.
Pitfall 3: Volume permission issues
Solution: Match container user UID with host user UID, or use named volumes instead of bind mounts.
Pitfall 4: Secrets in images
Solution: Never COPY secrets. Use build-time arguments or mount secrets at runtime.
Pitfall 5: No resource limits
Solution: Always set memory and CPU limits to prevent resource exhaustion.
Getting Started
Start container-first development today:
- Create a multi-stage Dockerfile for your application
- Add docker-compose.yml for local development dependencies
- Configure hot reload for your framework
- Add health check endpoints
- Scan images for vulnerabilities
- Document the setup in your README
Container-first development requires an initial investment in Dockerfile and Docker Compose configuration. Teams recoup this investment within weeks through faster onboarding, consistent environments, and reduced debugging of environment-specific issues.
The cloud-native future is container-first. Start building that way from day one.
Conclusion
Container-first development transforms how teams build and ship software. By treating containers as the default development environment from the very first commit, you eliminate environment drift, slash onboarding time, and achieve true parity between development, staging, and production.
The initial investment in Dockerfiles and Compose configuration pays back exponentially through faster debugging, consistent behavior across all stages, and seamless handoffs between team members.
In the cloud-native era, container-first isn't just a best practice—it's the baseline for teams that want to move fast without breaking things. Start every new project with a container, and you'll never look back.
Frequently Asked Questions
How do I handle live code reloading inside containers?
Use bind mounts to mount your source code into the container, combined with a development server that supports hot reload (nodemon for Node.js, Flask debug mode for Python, etc.).
In docker-compose.yml, add volumes: - ./src:/app/src and set the container command to your dev server. The container sees file changes instantly and reloads automatically.
What's the difference between development and production containers?
Development containers include debugging tools, test frameworks, and source maps, with bind mounts for live code reload.
Production containers are minimal and hardened: they run as non-root, contain only compiled/runtime assets (no source code), exclude dev dependencies, and are often based on distroless or Alpine images. Multi-stage builds let you maintain both from one Dockerfile.
How do I manage database schemas and seed data in containers?
Place SQL scripts in a directory mounted to the database container's initialization folder (PostgreSQL: /docker-entrypoint-initdb.d/).
These run automatically on first database startup. For ongoing migrations, run them via your application container using docker compose exec app npm run migrate. This keeps migrations version-controlled and reproducible.
Summarize this post with:
Ready to put this into production?
Our engineers have deployed these architectures across 100+ client engagements — from AWS migrations to Kubernetes clusters to AI infrastructure. We turn complex cloud challenges into measurable outcomes.